
The following article contains the steps to setup CentOS 7 in a VM. The virtualization application being used is VirtualBox on a Windows 10 host OS. This will be used for a local development environment with Git, Java, Maven and Docker.
Install VirtualBox
If you do not already have VirtualBox installed then head over to their downloads page: VirtualBox downloads
Download and install the latest VirtualBox. Follow the prompts to completion. The official site does have a manual if need be. At the time of writing this, VirtualBox 5.1.30 was used.
Download CentOS 7
The Linux distribution chosen for this tutorial is CentOS 7. If you have worked with Red Hat Enterprise systems before, this will be easy to work with.
Visit the Centos home page and download the minimal ISO image: CentOS downloads
Create the VM
Launch VirtualBox and click on the green ‘New’ cog icon.
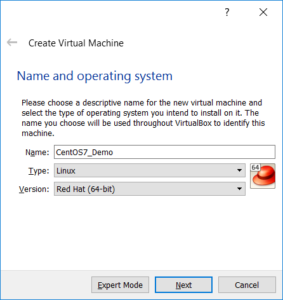
1-Assign a name to the VM and select ‘Linux’ as the type and ‘Red Hat (64-bit)’ as the version.
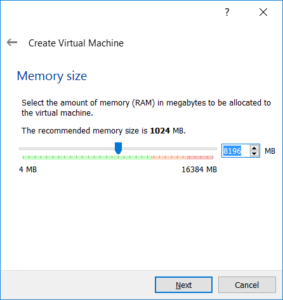
2-Allocate sufficient memory for the VM.
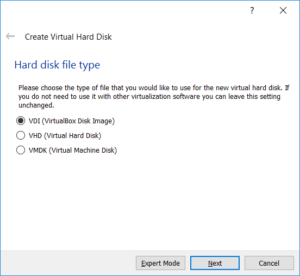
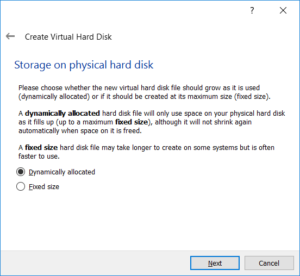
3-Create a virtual hard disk.
Keep the defaults which will be VDI (VirtualBox Disk Image). Decide which storage type will suit you best. Dynamically allocated is selected by default which will only fill up space as it is being used. The limit will be the virtual hard disk limit that is set. Ensure this is at least 8 GB.
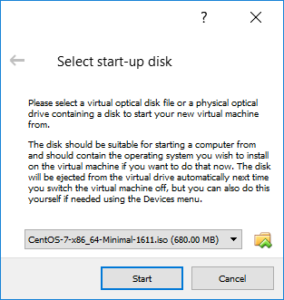
4-A prompt will appear to select the start-up disk for the VM. This is the CentOS 7 ISO image that was downloaded earlier.
Setup clipboard sharing and drag and drop functionality
To make life easier, setup clipboard sharing and drag and drop functionality. This will be useful if using a GUI or needing to copy over commands to the terminal.
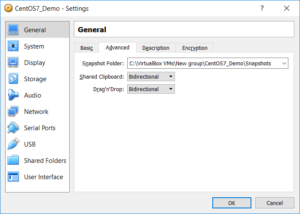
To set this up, go into the settings of your newly created VM -> Click ‘Advanced’ and selected bidirectional for the Shared Clipboard and Drag ‘n Drop items.
There is also a snapshot folder which is the destination of VM snapshots (essentially copies at particular points in time) that VirtualBox will create.
Boot the VM
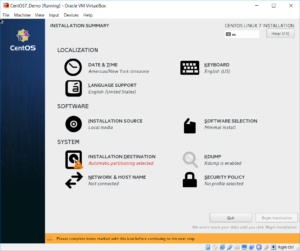
Start up the newly created VM. There should be a Welcome Screen to select your language for the remainder of the installation process. It will then take you to an installation summary page where localisation and system properties can be set.
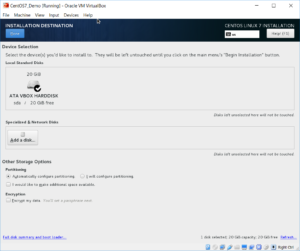
Click Installation Destination and select the device to install to. This will be the hard disk that was setup previously.
Notice that Network and Host Name will not be connected. Simply click into it and select the available network to use, e.g. Ethernet and click the toggle to set on.

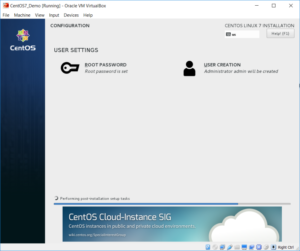
Finally, begin the installation. Towards the end of the installation there will be a chance to setup user settings for a root password and creating a user.
Setup the GUI
If the command line does not suit your needs then a GUI can be setup. GNOME desktop is used by CentOS, but since this is a minimal version it needs to be installed and enabled.
Below is a summary of the commands required.
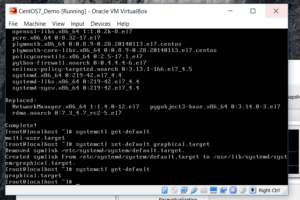
Install the GUI
yum groupinstall "GNOME Desktop" -y
Set graphical target
To start the GUI automatically on boot the system target needs to be set to graphical:
systemctl get-default
systemctl set-default graphical.target
systemctl get-default
reboot
There is a great resource for more details on the GNOME GUI: Install GNOME GUI in CentOS 7
This concludes part 1. In the next section part 2, the focus will be on shared drives and setting up development tools.